Alt-Fire
Devlog 4 - World Creation
Devlog 4 - World Creation
In most games, levels are the defining point of contact the game has with the player. Your mechanics, art, sound and systems don’t mean much - if your player doesn’t have a level in which to see, hear, and use them. As such - getting a strong foundation for how I plan to make levels for Alt-Fire, the arena shooter I’m working on, is essential. I’ve spent the last few months building out a level creation pipeline that, for me, is fluid and flexible - and took the opportunity to start exploring the game’s artstyle.
I’m Nick, and this is an Alt-Fire devlog about world creation.
Check out this devlog in video format

Why Levels So Early?
So you might be thinking to yourself: “Nick - why levels this early? Wouldn’t you rather be focusing on mechanics and enemies?” And if you were thinking that, great question. Traditionally you would be right, focusing on core game components would be key to progressing the game forward. And to a degree, I have done that already. The player controller is in, key weapon and item systems, and even the basic core of enemies. But permit me a brief aside:
Non-Multipliers
See, levels are what I like to call “non-multiplier” assets. As opposed to things like game code, art, sounds, and other assets - which are usually “multipliers” in nature. If it takes me 10 hours of work to get a new mechanic implemented, or to make a bunch of art assets - that code and those assets will be reused all over the project. Every time the player uses an ability, for example, it would be reused, and thus multiplies the value it adds to the project.
Levels - are not like that - at least not normally. Each level, in a single player linear campaign setting at least, is non-multiplicative, since by its nature you only see that environment once. In fact, at times I’d go as far to say that levels in a campaign might represent negative multipliers - since the average player might spend very little time in a part of a level that took significantly longer to make per second of playtime.
However, I absolutely don’t mean to say that effort was wasted. Were it missing, it would be noticed, or at least felt by the player. Much like animation, it's only when it goes wrong that the end user notices it.
So, knowing I want to have a linear, story driven campaign for Alt-Fire - and given my area of expertise is in level design, level art, and environment design - I opted to tackle the process of making levels earlier than normal. Setting up a fluid and flexible level making pipeline, so that I felt confident I could use it to deliver all the levels this game will need, which would take a huge weight off my chest.

Level Geometry
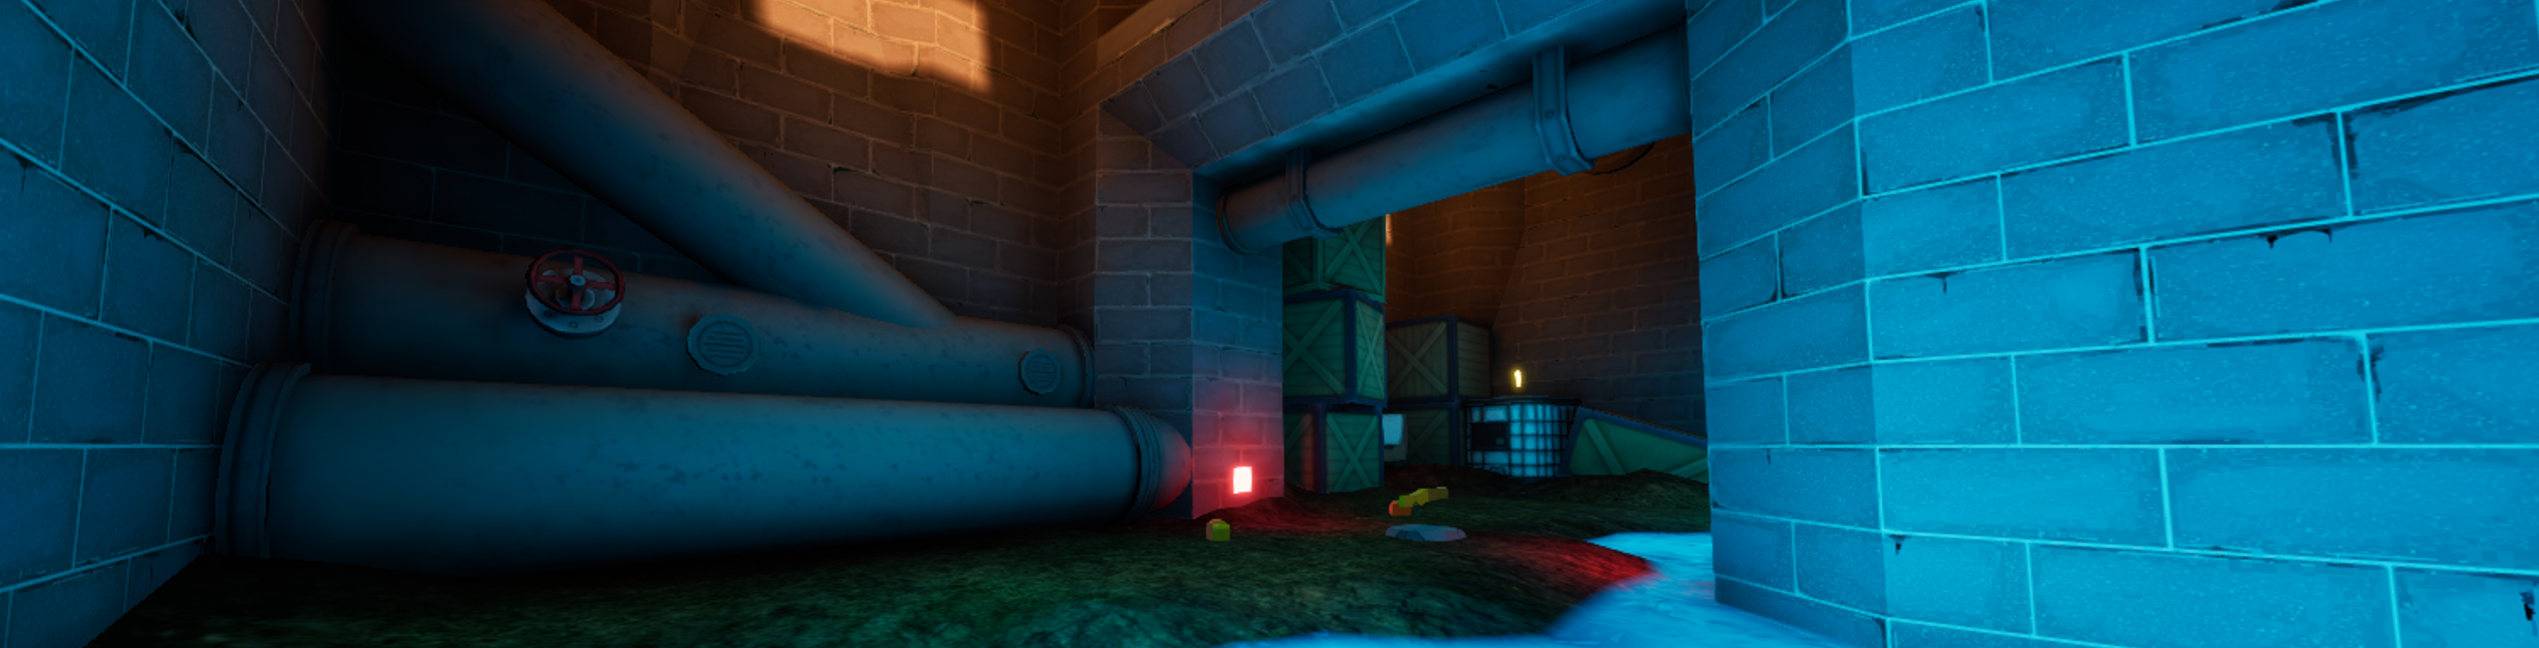
So the first step was figuring out level geometry. I define level geometry as the core structure to the level - walls, floors, doors, windows, pillars, ramps, and so on. This would be what I used to structure the levels for gameplay as greybox maps, but then also used - hopefully - for final geometry with textures and materials.
Tool Experimentation
Within and around Unreal there are a number of geometry editing pipelines. The ones I explored for making levels were:
- Modular kits
- Modular kit systems
- Unreal Cubegrid
- Unreal Modeling Tools
- TrenchBroom
- And BSP brushes.
For brevity I’ll summarize my findings, but if you want to know more in depth, let me know.
Having been a level designer and level artist for years, I am intimately familiar with modular kits - and as such I know they would take waaay too long to make, and way too long to get between greybox to complete. Even when using code to turn them into nifty reusable kit pieces, they still had the same inflexible clunk all modular kits do. What I needed was geometry editing tools.
Considering the lo-fi art style I intend for Alt-Fire, I want to make bulky geometry that I can slap textures on. That’s it.
So, with wide eyes, I turned to Cubegrid. A blocky level prototyping tool Unreal offers as part of their modeling tools. (It’s what all the levels in the game until now were made with). However, it too didn’t work out, since it really wasn’t built with level artists in mind. The friction with texturing, baking lightmaps, and adjusting the geometry pushed it over the line. I briefly considered using the modeling tools themselves, but again, they are not built with fluid and flexible level design at their core.
Around this time I was watching a Project Feline devlog, where the developer showed off a neat tool they were using for their level design: Trenchbroom. A modernized, BSP based, Quake editor - which could export as meshes into Unreal. Despite not being enthused about level designing in a separate app from Unreal, at least the workflow was closer to what I was looking for. Unfortunately, it too didn’t work out because of the fundamental issue with large singular meshes in Unreal - and the plugin to make them break up into pieces didn’t work with my version of UE5. All of which led me back to an old friend… BSP.
BSP in the end
BSP, or binary space partition brushes, is a very old method of making 3D geometry. If you’ve ever made maps for the original Doom, Quake, Counter-Strike, GMod, Half Life (or other Source engine games) or even older Unreal games like Unreal Gold or UT9, you’d have been making those using BSP.
Despite how it was presented here, I actually have a boatload of experience with BSP. Both as a full level creation tool in older engines, and as a greybox tool in Unreal Engine 4. I use it for greyboxing in Unreal Tournament 4, and all the levels in Evasive Maneuvers were actually made with BSP as well.
Having grown up using it, and carried that expertise into my career:
- I find it flexible, since you can edit the primitives easily at any time.
- I can move efficiently since I can just add and copy shapes in context, ultimately massaging a level into place like molding clay.
- It has modest but predictable selection and texturing tools.
- Geometry is just stored in the level itself, so no new assets are generated or stored.
- And it has a dynamic scaling lightmap resolution that - by design - supports baked lightmaps.
Despite all that praise, the conversation surrounding BSP online is often:
- “you should only use it for prototyping”,
- or “it’s old, they’re phasing it out, and you shouldn’t use it”,
- or “it is unperformant and is prone to glitches”.
Those that don’t outright dismiss BSP, will say it's fine but you have to convert it to a static mesh before shipping - a destructive process that can make for giant, glitchy meshes you end up having to edit in blender anyways. Even Epic themselves recommend not using it for final geometry in the documentation. But I think the most important lesson I’ve learned in this whole process is this:
Does it work for you?
For me, using BSP gets me from nothing to level in half an hour, and from level to finished level in a few hours. All while I have a frictionless and fun time making it. And I’d like to take a second to highlight that second point - fun. Do I want to sit down to make level 14/100 saying “oh my god I don’t want to even bother with all this fuss” - no, I’d rather be excited to do it, since the player will feel that joy and love in the final game.
Plus, I did my due-diligence and pressure-tested working with BSP, finding its performance limits, behavioral exceptions, and learning what workarounds I’ll have to consider. What about those flaws though? Yep. They’re there. Is BSP perfect? No. But nothing is - and I’d rather work around its flaws, than the flaws of modular kits, cubegrid, or giant meshes.
So I’ll say this: if you are a level designer, or budding level designer, and you just can’t get into a groove with the tools you have - explore other options. You never know what might click with your workflow, and whatever that is - I think will make for your best work yet.
Assets
So, we’ve tackled the approach to level geometry and why I started with levels this early, let’s dive into textures, props and the beginnings of the art style for the game.
Art Style
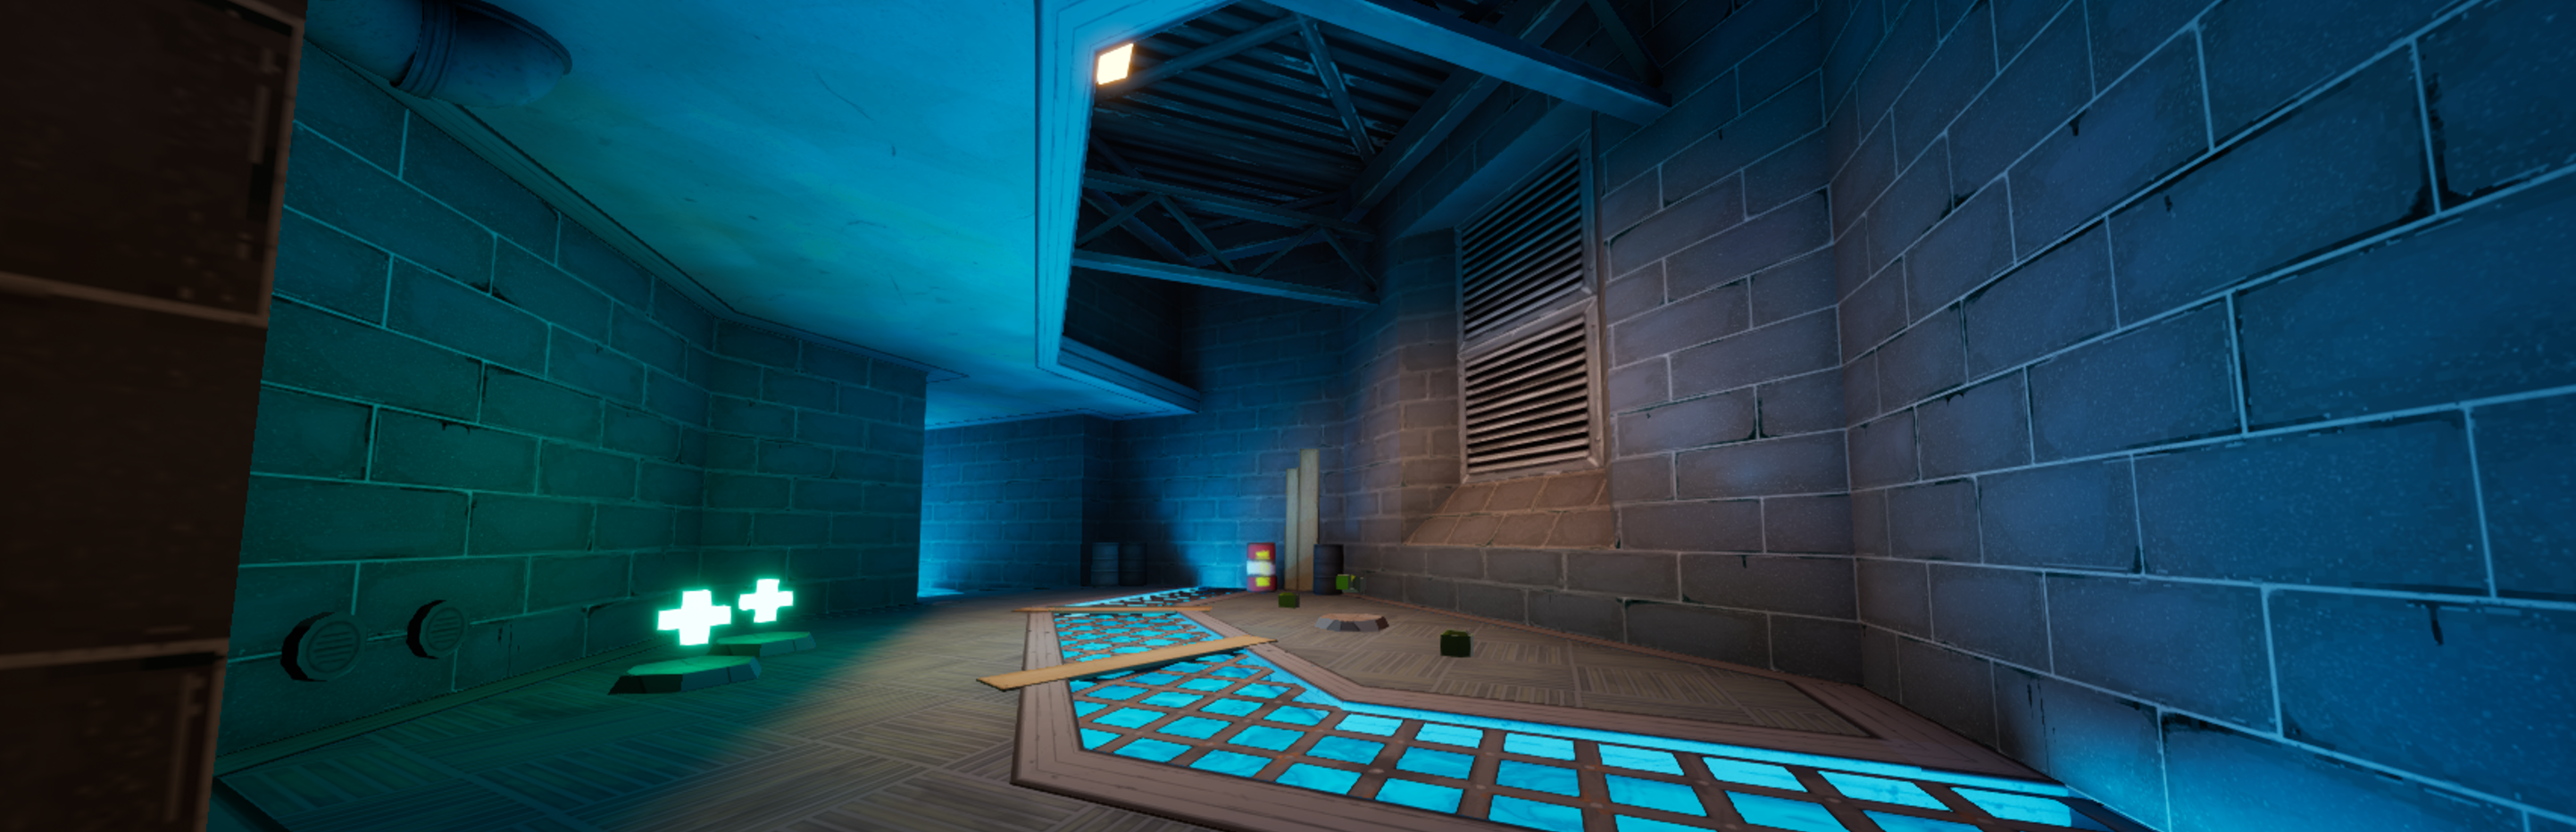
For a while I struggled with what I wanted the texture and overall art style to look like for Alt-Fire. I knew it had to be relatively lo-fi, both because I like the art style, and for practical reasons. There is going to be a lot of art I need for this game, and as one person I need to make an art style that I can recreate over the course of years of work.
At first it was going to be pixelated unfiltered textures, but that still didn’t feel right. A lot of indie shooters have been going down that route, and while it looks smashing, I want mine to stand out if possible. Luckily, around that time I was watching Arcane season 2 again and their masterful use of hand painted 3D characters and props really gives the show a distinct look. Now I am not going to claim I can come even close to Fortiche’s artistry - but it did get me thinking.
My concept art and sketches have a pretty messy, brush stroke filled look to them, often full of vibrant color blocking - what if my textures looked like that too. Bring a sense of me into the piece. Not only is that more artistically authentic for me, but it feels unique, and since it's my natural style it would come quickly.
Thus - BAM
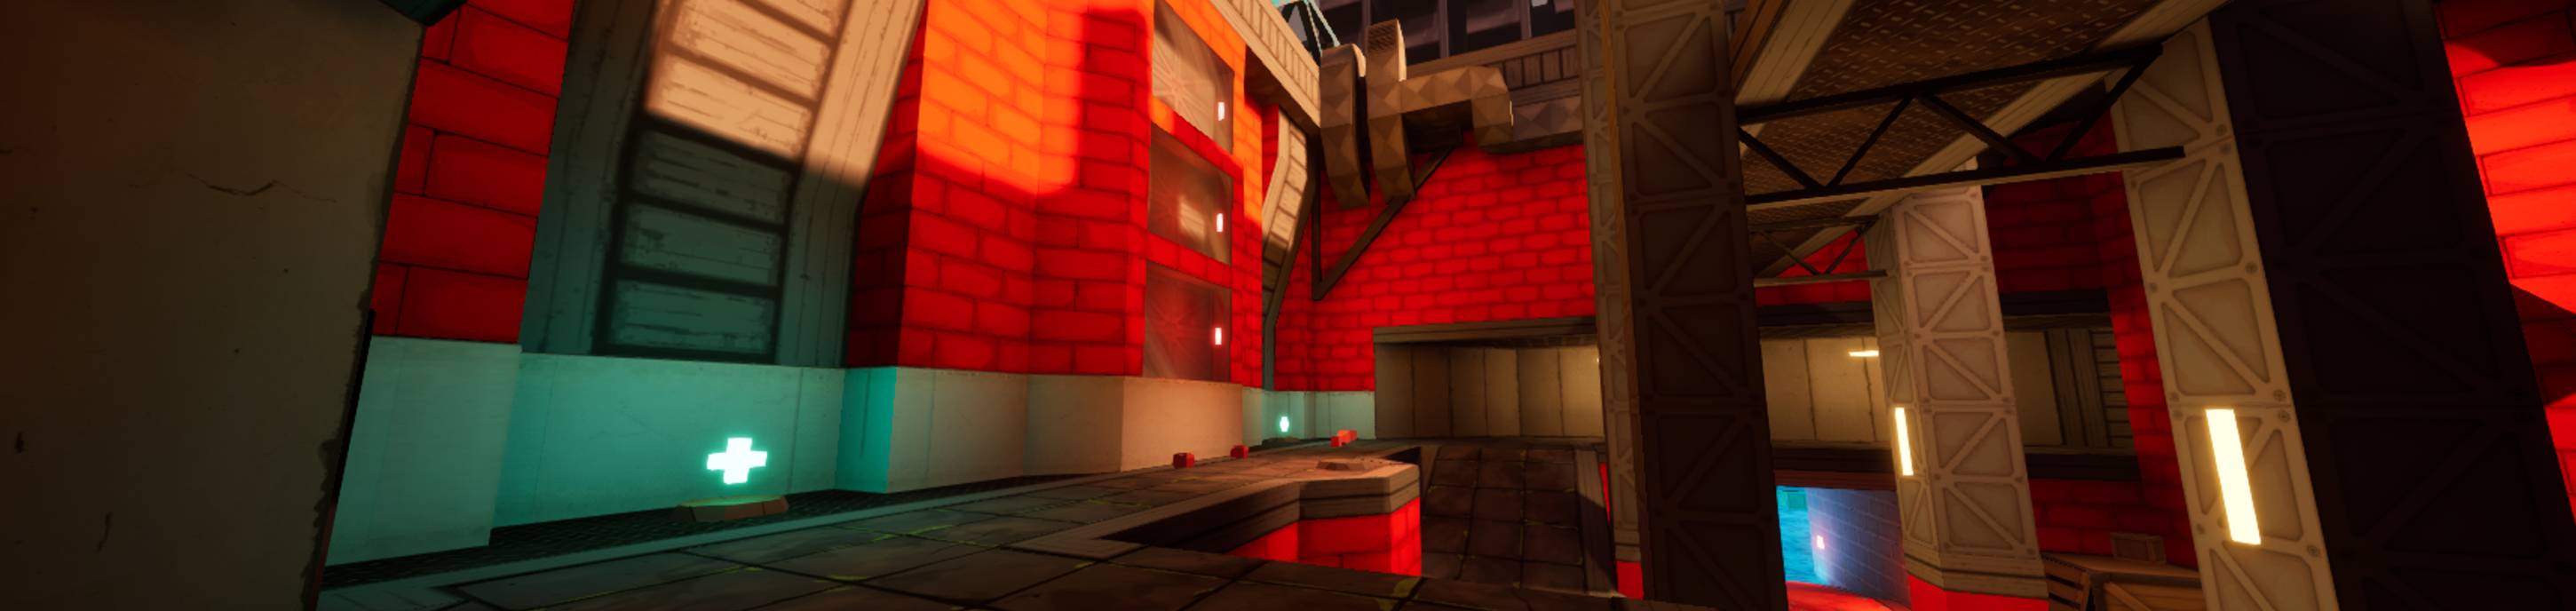
A sketchy, messy hand painted art style, across lower fidelity stylized textures, and designed with bright color blocking elements to them. A look I quite like, and that is an authentic artistic representation of my style. One I can hone, and keep up, over the course of development.
Textures
Each texture is a creative mix of stock texture masks, like ambient occlusion, height, noise, and roughness, overlaid on top of hand painted additive RGB color masks which are controlled in Unreal, and placed on a fully rough, flat material. There are also texture masks for opacity masking and emissive colors too. This texture packing method means I can control 4 colors to make up the texture, and the blending of those 4 layers with a single 512x512 PNG file. If I was feeling spicy I could also eke out a 5th using alpha.
The result is a lot of control over the look and feel of texture, in the context in which they are being used. I’ll admit, after getting through the props - which we’ll talk about next - there are some changes I’d like to make to the style, but the process is straightforward enough I could get all these textures made in just a few days. And some of these aren’t even done but hey it's a lot of textures and this whole process was front loaded with learning how exactly I’d go about doing this all in the first place.
3DTextures.me
Side note, I have to give a big shout out to 3DTextures.me - that website is full of amazing free textures which I’ve used as the base for many of mine. Seriously, consider giving it a look if you need textures, and if you want to download them more conveniently and support the creator, donate to their patreon!
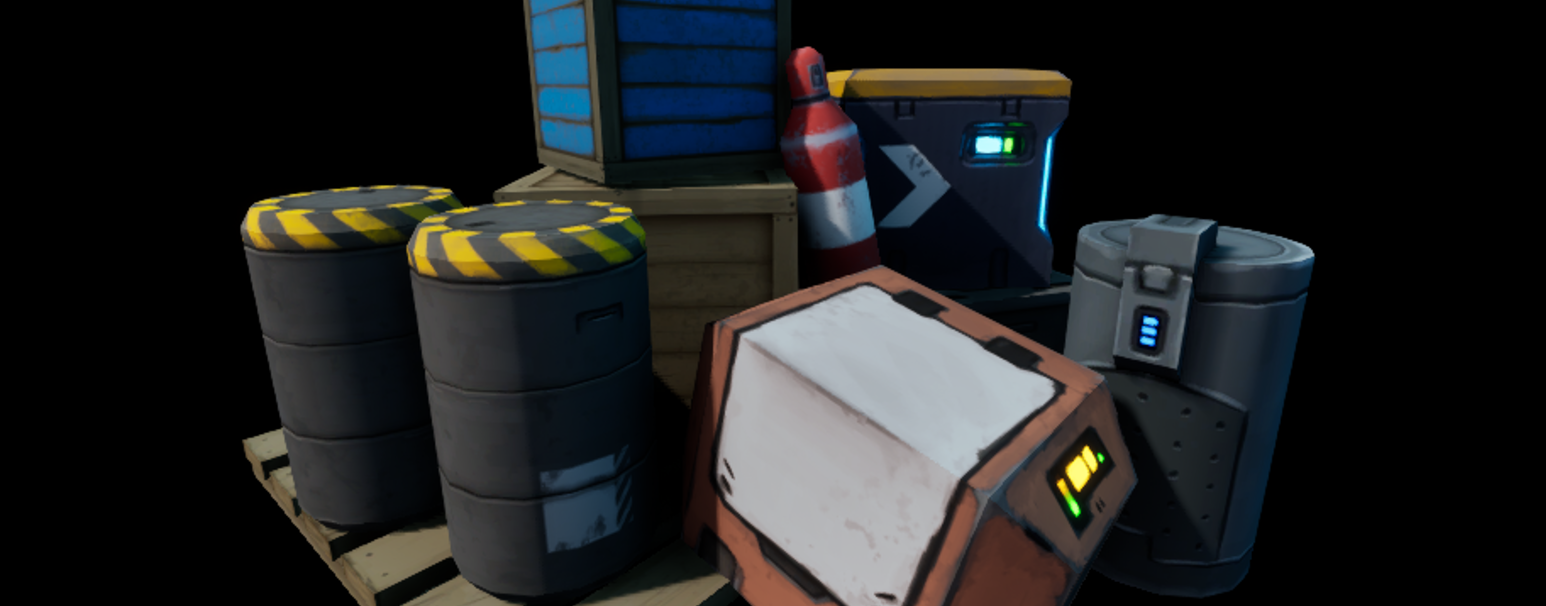
Props
Once I had things like walls and floors sorted, it was time to tackle objects. As nice as the textures were, you have to have meshes to populate the space with for detail - and for having physics props. So I gathered a ton of references, and got to modeling environment props in blender. Because it was a theme I knew I’d use, I targeted a sci-fi industrial look first.
Piece of advice - when you’re doing this yourself - don’t make 96 assets per batch. Turns out 96 meshes needing modeling, Uving, collisions, importing, textures, and materials - is a lot. I definitely bit off more than I could chew here, but I’m happy with the result and next time I’ll work in smaller batches.
Making meshes
Once the mesh was modeled, optimized and UVed in Blender, I would export them out for import into Unreal. This is where the batch export plugin for Blender came in clutch and saved me a major headache - almost. The batch exporter dutifully takes all the selected meshes in the scene and exports them according to my Unreal Static Mesh standard. But the way Unreal handles collision meshes puts a bit of a wrinkle in this process.
Collisions for FBX files in Unreal are done by, in Blender for example, having a mesh - then a mesh on top of it called UCX_MeshName. So when you export as FBX, you export both, but Unreal ignores the UCX one and assigns it as the collision mesh. Great for bespoke collisions - bad if you have to export 96 assets at the same time, since the batch exporter just thinks the UCX files are also meshes to export.
So I had to:
- Select all meshes, and hide all UCX meshes, and batch export.
- Then, one at a time, export and overwrite the FBX file so it has the UCX data.
- Then bulk import to Unreal.
The good news is past that point, overwriting the FBX without the UCX and importing to Unreal doesn’t remove the UCX data from the Unreal mesh.
Ie - you just have to do it - once. Thank god.
Texturing props
After that headache, I would use 3DCoat to texture paint the relevant mesh with different exports for a diffuse map, as well as the color mask, opacity mask and emissive mask (where necessary).
Honestly, 3DCoat is such a cool program. If you want to get into texture painting, are willing to spend some money on an app, but don’t want to pay at the big Adobe altar - seriously consider giving 3DCoat a try. It is definitely a quirky piece of kit - but it does what it does better and more consistently than anything else for the price.
The result is some pretty spiffy looking meshes if I say so myself - which hold what I think is a charming amount of artistic messiness.
There are so many more props to make, even just for the sci-fi industrial set I’ve half made here - but those will come in time. This process has validated that I like the way the art style is looking, and makes me really excited to work on weapons and characters.
Next Steps
Clearly - I’m not done. There are lots of incomplete textures, and many more meshes to make. Not to mention I wanted to have things like decals, grit and grime, puddles, ambient environment effects like smoke, mist, light shafts, and working blueprints for light sources, doors and other environment elements.
Life had other plans, paired with the fact that 96 assets is a lot of stuff to make while also figuring out how to make it in the first place, so I didn’t quite get it all in on time. That being said, this whole process has given me the confidence I need to move forward with my level design and geometry, texture pipeline, asset pipeline, and overall world creation process.
Hopefully you’ve enjoyed this little showcase of what I’ve been working on. It’s been a lot of long nights to get as much of this as there is, in and working. But I think the result is well worth it.
If you want to follow the project, links are below:
- Bluesky
- Itch.io
- SkyPyre community discord (which now has an Alt-Fire category)
- Newly minted Alt-Fire website!
A new demo isn’t ready quite yet, but I’m hoping that might come a little later this year.
Thank you for watching, I’ve been Nick, and until next time, take care.
Leave a comment
Log in with itch.io to leave a comment.